If you need to send emails from a static page or a single-page application, EmailJS seems like a logical choice.
However, there are security implications of your choice because everything happens client-side. This write-up disambiguates those implications for you and tells you how to send emails in Email.js safely.
Introduction to EmailJS: bridging client-side and email sending
EmailJS is a service that allows you to send emails directly from the client side using JavaScript, without needing any server-side code. It acts as a bridge, securely handling the communication between your frontend application and an email service provider (ESP) like Gmail, Outlook, or Mailtrap.
Traditionally, sending an email from a web application requires a backend server. This server contains sensitive information, such as API keys and credentials, which are used to communicate with an ESP. The frontend then sends a request to this server, which, in turn, triggers the email.
EmailJS simplifies this process significantly. By integrating with the EmailJS SDK, a developer can trigger an email sent from the user’s browser without ever exposing their private keys. This is particularly useful for single-page applications (SPAs) and static websites where setting up a backend is not feasible or desired. It’s a quick and efficient solution for simple tasks like contact forms, feedback forms, and notifications.
Security considerations and best practices
The primary concern is the exposure of your public key. Although EmailJS’s public key is designed to be safe for client-side use, an attacker can still use it to spam your service, potentially leading to rate-limiting or an abuse report against your email service provider.
To mitigate this, always implement security best practices:
- Use reCAPTCHA or other bot detection services. This is one of the most effective ways to prevent automated abuse of your email form. EmailJS integrates with services like Google reCAPTCHA v3 to verify that the sender is a human.
- Implement server-side validation for critical applications. For high-stakes or high-volume applications, relying solely on client-side sending is not recommended. Instead, consider using a backend to handle email sending. EmailJS is best suited for low-volume applications like a portfolio contact form.
- Understand your email service provider’s rate limits. ESPs have daily sending limits. Abusing these limits, whether intentionally or through a bot attack, can lead to your account being suspended.
A good practice is to always use a dedicated email provider like Mailtrap. The main advantage is that you can have a centralized log of all your sent emails and monitor the critical email stats.
This allows you to inspect email headers, bodies, and attachments, which is invaluable for debugging and monitoring. And in the long run, it helps you reduce bounce rates and spam complaints.
Getting started: setting up your EmailJS account and project
To start using EmailJS, you’ll need to set up an account and connect an email service. The process is straightforward and takes only a few minutes.
Create a free EmailJS account
- Navigate to the EmailJS website.
- Click the “Sign Up Free” button.
- You can sign up using your Google account, GitHub, or an email and password.
The free plan is sufficient for testing and low-volume personal projects, offering 200 email sends per month.
Connect an email service provider
Here, we show you how to send emails in Email.js safely. After signing up, you need to connect an email service to handle the actual sending.
- From your EmailJS dashboard, click on “Email Services.”
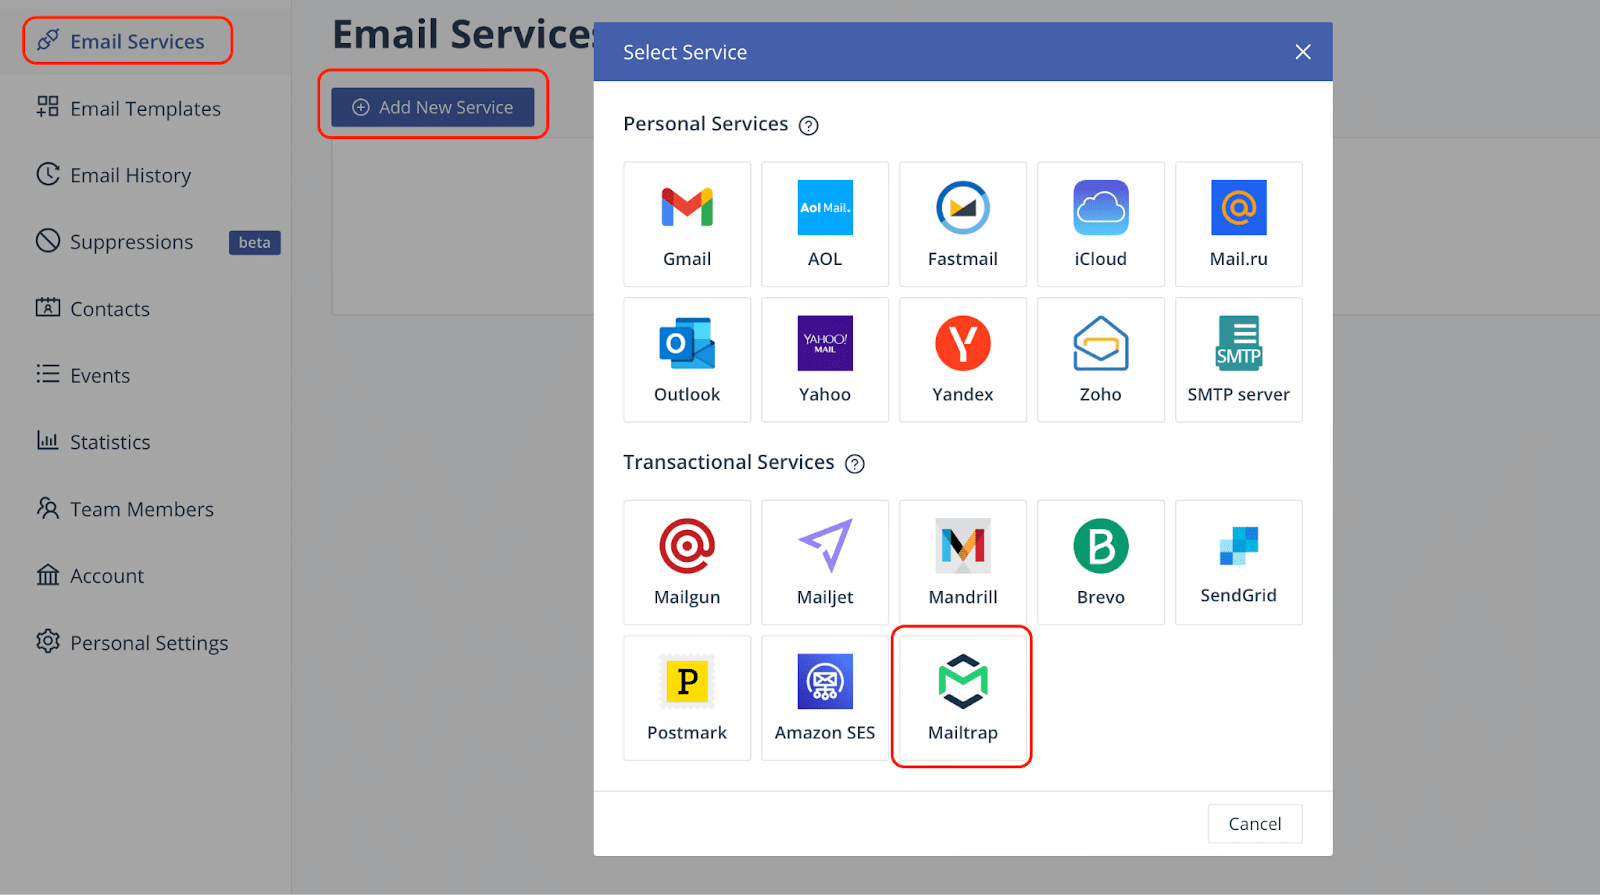
- Select an email service provider. For this tutorial, let’s use Mailtrap as our email service (a free account will be enough for you to get started). Mailtrap provides a secure and reliable SMTP service and also offers a testing environment for all your emails.
To connect to Mailtrap, you will need your credentials to connect to Mailtrap’s SMTP server, which can be found in your Mailtrap account under SMTP Settings.
Next, configure the service (within Email.js) by providing the following details:
- Username and application-specific password for SMTP authentication: Find your credentials by going to your Mailtrap dashboard and then navigating to Sending Domains > Integration > SMTP. (If you can’t find your Mailtrap API key there, go to Settings > API Tokens).
- Service ID: A unique identifier for this service. You can name it something like “mailtrap_service” or any name you like.
- Email feature (under EmailJS): Select “Sending” from the dropdown menu.
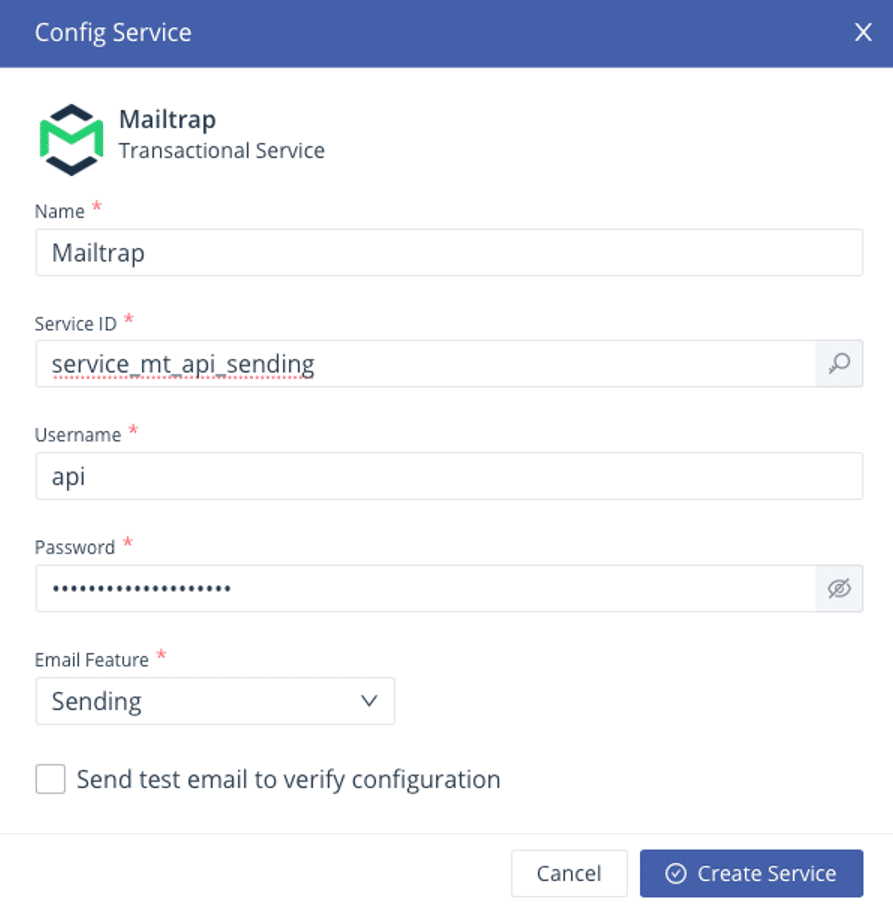
If you experience issues when trying to configure Mailtrap in EmailJS, uncheck “Send test email to verify configuration.”
Important Note: To send emails from Mailtrap, you need to add and verify your domain first by adding the provided DNS records to your domain provider’s DNS. If you have a dev or admin handling this task, there’s an option to email the responsible person the settings.
Locating your EmailJS Service ID and Public Key
These are the credentials you’ll use in your application.
- Service ID: Found under the “Email Services” section. It’s the unique identifier for the email service you just added.
- Public Key: Found under the “Account” section in your dashboard. This key is safe to use in your client-side code.
- Template ID: You will get this after creating an email template.
Installing and Initializing EmailJS in Your Application
You can add the EmailJS library to your project in a few ways:
- NPM/Yarn:
| npm install @emailjs/browser –save |
or
| yarn add @emailjs/browser |
- CDN:
| HTML <script type=”text/javascript” src=”https://cdn.jsdelivr.net/npm/@emailjs/browser@3/dist/email.min.js”></script> <script type=”text/javascript”> (function(){ emailjs.init(“YOUR_PUBLIC_KEY”); })(); </script> |
After installation, you need to initialize the SDK with your Public Key.
| import emailjs from ‘@emailjs/browser’; emailjs.init(“YOUR_PUBLIC_KEY”); |
Designing your email templates in the EmailJS dashboard
EmailJS uses templates to separate your email content from your code. This approach offers flexibility and simplifies managing different email types without changing your application’s logic.
Creating a new email template from scratch
- In your EmailJS dashboard, go to the “Email Templates” section.
- Click “Create New Template.”
- Give your template a name, like “Contact Form Submission.”
Important note: When creating the template, make sure the box in front of “Use Default Email Address” is unchecked. At the time of writing, there was an issue that renders the integration obsolete.
Crafting rich HTML emails within templates
EmailJS templates support rich HTML emails. You can design a professional-looking email with images, links, and custom styling.
Example HTML code:
| <p>Hello Team,</p> <p>You have a new message from {{from_name}} ({{from_email}}).</p> <p>Message details:</p> <p>{{message}}</p> <p>Best regards,</p> <p>Launchspace Team</p> |
Using Dynamic Variables in Templates
The key to a powerful template is using dynamic variables. These are placeholders enclosed in double curly braces, like {{from_name}}. When you send an email, you pass a data object, and EmailJS replaces these variables with the corresponding values.
For example, to populate {{from_name}} and {{message}}, your JavaScript code will pass an object with from_name and message properties.
Pro Tip: Pay special attention to dynamic variables if you plan to send marketing emails to boost your business.
Sending emails with EmailJS
There are a few ways to trigger an email sent with EmailJS, depending on your use case.
Basic email sending with emailjs.send()
This is the most common method. You pass the Service ID, Template ID, and a parameters object.
| import React, { useRef } from ‘react’; import emailjs from ‘@emailjs/browser’; export const ContactUs = () => { const form = useRef(); const sendEmail = (e) => { e.preventDefault(); emailjs.sendForm(‘YOUR_SERVICE_ID’, ‘YOUR_TEMPLATE_ID’, form.current, ‘YOUR_PUBLIC_KEY’) .then((result) => { console.log(result.text); }, (error) => { console.log(error.text); }); }; return ( <form ref={form} onSubmit={sendEmail}> <label>Name</label> <input type=”text” name=”from_name” /> <label>Email</label> <input type=”email” name=”from_email” /> <label>Message</label> <textarea name=”message” /> <input type=”submit” value=”Send” /> </form> ); }; |
This code snippet provides a clear, actionable example of how to implement a contact form that sends an email using the ‘emailjs.sendForm’ method.
Code breakdown:
- import React, { useRef } from ‘react’;: Imports the useRef hook from React to create a reference to the form element.
- import emailjs from ‘@emailjs/browser’;: Imports the EmailJS library to access its functions.
- const form = useRef();: Initializes a React ref to reference the form. This is how you access the form element in the DOM.
- const sendEmail = (e) => { … };: Defines the function that will handle the form submission.
- e.preventDefault();: Prevents the default form submission behavior, which would cause a page reload.
- emailjs.sendForm(…): The core EmailJS function that sends the email.
- ‘YOUR_SERVICE_ID’: Your unique EmailJS Service ID.
- ‘YOUR_TEMPLATE_ID’: The ID of the email template you created.
- form.current: The reference to the form element, which contains all the input data.
- ‘YOUR_PUBLIC_KEY’: Your EmailJS Public Key.
- .then(…) and .catch(…): Handles the promise returned by emailjs.sendForm(), allowing you to manage success and error outcomes.
- <form ref={form} onSubmit={sendEmail}>: The form element. The ref attribute links the form to the useRef hook, and the onSubmit handler calls the sendEmail function.
Form integration with emailjs.sendForm()
For forms, the ‘sendForm()’ method simplifies the process even further. It automatically collects all the input fields from a specified form and sends them as parameters.
| import emailjs from ‘@emailjs/browser’; const sendEmail = (serviceId, templateId, form, publicKey) => { emailjs.sendForm(serviceId, templateId, form, publicKey) .then((result) => { // Handle success console.log(‘SUCCESS!’, result.status, result.text); }, (error) => { // Handle error console.log(‘FAILED…’, error); }); }; const myForm = document.getElementById(‘contact-form’); myForm.addEventListener(‘submit’, function(event) { event.preventDefault(); sendEmail(‘YOUR_SERVICE_ID’, ‘YOUR_TEMPLATE_ID’, this, ‘YOUR_PUBLIC_KEY’); }); |
This method is great for forms built with plain HTML emails and JavaScript. And again, here’s a quick breakdown of what goes on here.
Code breakdown:
- import emailjs from ‘@emailjs/browser’;: Imports the EmailJS library.
- const sendEmail = (…) => { … };: A function that encapsulates the logic for sending the email.
- emailjs.sendForm(…): The key function for form-based sending.
- const myForm = document.getElementById(‘contact-form’);: Selects the form element from the DOM using its ID.
- myForm.addEventListener(‘submit’, …): Adds an event listener that waits for the form to be submitted.
- event.preventDefault();: Stops the form from performing its default action (page reload).
- sendEmail(…): Calls the sendEmail function with the required parameters, including this, which refers to the form element that triggered the event.
Sending HTML content and attachments
EmailJS allows you to send emails with rich HTML content and attachments. Here’s an example:
| const templateParams = { to_name: ‘Recipient Name’, from_name: ‘Sender Name’, html_content: ‘<p>This is a custom <strong>HTML</strong> email!</p>’, // For attachments, use a base64 encoded string attachments: [ { name: ‘attachment.txt’, data: btoa(‘This is the content of the attachment.’) } ] }; emailjs.send(‘YOUR_SERVICE_ID’, ‘YOUR_TEMPLATE_ID’, templateParams, ‘YOUR_PUBLIC_KEY’) .then((response) => { console.log(‘SUCCESS!’, response.status, response.text); }, (err) => { console.log(‘FAILED…’, err); }); |
The HTML content can be passed as a dynamic variable within your template, and attachments need to be in a specific format (base64).
Code breakdown:
- const templateParams = { … };: An object containing the data to be sent to the email template.
- to_name: A custom parameter to be used in your template (e.g., {{to_name}}).
- html_content: A string containing the HTML you want to render in the email body.
- attachments: An array of objects for attaching files, where the name is the file’s name and data is the file’s content, encoded in Base64. btoa() is a JavaScript function used to perform this encoding.
- emailjs.send(…): The function used to send the email with the specified parameters.
- ‘YOUR_SERVICE_ID’: The ID of your email service.
- ‘YOUR_TEMPLATE_ID’: The ID of the template you want to use.
- templateParams: The object containing the dynamic data.
- ‘YOUR_PUBLIC_KEY’: Your Public Key.
Error handling and debugging common issues
Robust applications always include error handling. The ‘send()’ and ‘sendForm()’ methods return a promise. You can use ‘.then()’ and ‘.catch()’ to handle success and failure cases.
Common issues to debug:
- Incorrect Service ID, Template ID, or Public Key. Double-check that these are correct and haven’t been mixed up.
- Network issues. Check the browser’s console for any network-related errors.
- Rate limits. You may have reached your daily sending limit.
- Template variable mismatch. Ensure the variables you pass in your code match the placeholders in your template.
For a deeper look into the debugging process and to avoid sending test emails to real users, you can use a tool like Mailtrap.
Wrapping up
EmailJS offers a compelling solution for developers who need to send emails directly from their frontend. It simplifies a complex process, making it accessible for static sites and single-page applications without the need for a full backend.
However, understanding the security implications and following best practices is essential. By combining EmailJS with a robust email provider like Mailtrap, you can ensure your email functionality is not only easy to implement but also reliable, secure, and professional.